July 29, 2010

A Reminder.....


New Blog URL Name Notice:
I'm changing the url for my blog and I wanted everyone to be aware. (I think with blogger, the RSS feeds, etc.) don't link once the url changes. I pray the followers stay - that's what I'm being told anyway.
So in a few days I'll update my blog to the new address:www.thecupcakecricut.blogspot.com

Please check back in a few days for an update.

And thanks for following me!! :O)

New Cards To Post


I'm posting some new cards I just finished. Well I did them at my scrapbook club on Tuesday. I also did a page and forgot to take a picture of it....sry...:O(

July 27, 2010

Close To My Heart Consultant Yes? No?

I have an opportunity to become a consultant for Close To My Heart (CTMH). What do you guys think? They have an awesome offer going on right now. Can you let me know what you think?

BTW, I'd love to become one and of course get all the goodies, but when I was a consultant for CM, my leader just wasn't the nicest. What should I do?

Thanks for responses!!

Cupcake!

Isn't this pretty? I found it online! I need to get started making my own. Pics soon to come! :O)

Good Morning!

Today, I'm scrapping with a group here at the library. We are supposed to start around noon, but it still remains to be seen.

I watched a movie called Facing the Giants this morning and I think it never gets old. God's word never gets old. If you've never seen it, get it!! Run don't walk.

It's such a touching movie. One quote that I love is "do your best and leave the results up to God".

Have a great day everyone!

Blessings,

PCM

July 26, 2010

Basic Vanilla Recipe

Vanilla Buttercream:


The vanilla buttercream we use at the bakery is technically not a buttercream but actually an old-fashioned confectioners' sugar and butter frosting. Be sure to beat the icing for the amount of time called for in the recipe to achieve the desired creamy texture.

1 cup (2 sticks) unsalted butter, softened
6 to 8 cups confectioners' sugar
1/2 cup milk
2 teaspoons vanilla extract

Place the butter in a large mixing bowl. Add 4 cups of the sugar and then the milk and vanilla. On the medium speed of an electric mixer, beat until smooth and creamy, about 3 to 5 minutes. Gradually add the remaining sugar, 1 cup at a time, beating well after each addition (about 2 minutes), until the icing is thick enough to be of good spreading consistency. You may not need to add all of the sugar. If desired, add a few drops of food coloring and mix thoroughly. (Use and store the icing at room temperature because icing will set if chilled.) Icing can be stored in an airtight container for up to 3 days.
Yield: enough for 2 dozen cupcakes or 1 (9-inch) layer cake

Did I mention that I love Cupcakes?


Ingredients
1 1/2 cups all-purpose flour
1 1/2 teaspoons baking powder
1/4 teaspoon fine salt
2 large eggs, room temperature
2/3 cup sugar
3/4 cup unsalted butter, melted
2 teaspoons pure vanilla extract
1/2 cup milk
Icing:
1 1/3 cups confectioners' sugar, sifted
1 1/2 tablespoons finely grated lime zest
2 tablespoons freshly squeezed lime juice
Directions
1 drop green food coloring
6 large ripe strawberries, hulled
Green sanding sugar
Fresh mint leaves or candied leaves
Equipment: 6-cup jumbo muffin tin
Preheat the oven to 350 degrees F.
Line the muffin tin with cupcake liners.
Whisk the flour, baking powder, and salt together in a medium bowl.
In another medium bowl, beat the eggs and sugar with an electric mixer until light and foamy, about 2 minutes. While beating, gradually pour in the butter and then the vanilla.
While mixing slowly, add half the dry ingredients, then add all the milk, and follow with the rest of the dry ingredients. Take care not to over mix the batter. Divide the batter evenly in the prepared tin.

Bake until a tester inserted in the center of the cakes comes out clean, about 30 minutes. Cool cupcakes on a rack in the tin for 10 minutes, then remove. Cool on the rack completely.
For icing: Mix the confectioners' sugar and lime zest in a medium bowl. Add the lime juice and mix with an electric mixer to make a firm but pourable icing. (If needed, add up to 1 teaspoon more juice, but take care if the icing is too loose it doesn't set properly.) Add food color to make a pale pastel green icing.

To assemble: Remove cupcake from its liner. Cut and remove a strawberry (coned) shaped portion of cupcake from the top of each cupcake, leaving about 1/2 to 1-inch of cake in the bottom. Stuff each cake with a strawberry and cover with a little bit of cake. Spoon and spread icing over the top of the cupcakes. Sprinkle with green sanding sugar. Top with small mint leaves or candied leaves.
From TVFood Network!

I heart Coupons! Coupon NOTICE!!

The Scrappin Cricut has coupons posted every week. I'll try and post the link so you can link to her too ! :O)
This is a posting just to continue to enable us!! :O)

Awesome Blog Candy Op!!

Over at inkedinspirations there is a great blog giveaway! It's her birthday and she wants to share! I love things like that!
http://inkedinspirations.blogspot.com/2010/07/its-my-birthday.html
Here are some of the goodies being given away:


Color challenges @ The Playdate Cafe


This is an excellent way to get those colors used too! Here is their link:
www.theplaydatecafe.blogspot.com Have fun they are so creative over there! :O)


NOTICE! New Blog URL Coming Soon! NOTICE!

New Blog URL Name Notice:

I'm changing the url for my blog and I wanted everyone to be aware. (I think with blogger, the RSS feeds, etc.) don't link once the url changes. I pray the followers stay - that's what I'm being told anyway. So in a few days I'll update my blog to the new address:

www.thecupcakecricut.blogspot.com
Please check back in a few days for an update.
And thanks for following me!! :O)

How To Tie A Perfect Bow

1. Start with your ribbon around your card or project with ends pointing away from you.2. Cross left end over right end, wrap around, and pull through. Make sure to pull gently to avoid twisting or wrinkling your ribbon.3. Place your finger in the middle to hold ribbon tight. Cross right end over left end, wrap around, and pull through. Pull knot gently, untwisting and arranging ribbon as needed.4. Trim the ends. Notice how we’ve added a twist to this on our My Friend bag. We tied a classic knot leaving a loop of ribbon, and then threaded that loop through two holes in our bag. Tip: Wrap your ribbon around an object to tie your knot. Then just slide it off the object and you’ve got a loop to work with.
Tying a Classic Bow
(Nicole’s note: I got a kick out of the instructions for the classic bow. It uses a technique that a friend used years ago to teach my oldest daughter how to tie her shoes – bunny ears! ) Classic Bow aloneIf you simply want a bow without tying it around anything, the concept is rather simple.
1. Fold the ribbon back and forth to form two loops (or bunny ears).
2. Tie the two bunny ears together, left over right.
3. Pull gently, and trim ends as desired. This classic bow is an easy way to add an accent to your project without wrapping the ribbon around an element of your project.
Tie this classic bow, and adhere it to your project with Glue Dots.
Classic Bow around a card or object
1. Start with your ribbon around the card or object. Cross left end over right end, wrap around, and pull through.
2. Make a loop with the ribbon that is now on the right side. Bring left end toward you and around the loop.
3. Push left end through hole forming a second loop.
4. Pull loops gently. Once you’ve got the classics down, you’ll want to add some diversity to your projects by trying these variations. And honestly, you might find these variations easier than the classics. Experiment a bit and see what you discover.

Tying a Tiered Bow

1. Choose two or three widths and types of ribbon. We’ve used Chocolate Chip wide grosgrain ribbon and the wide Chocolate Chip satin ribbon from Theater Ribbon Originals®.2. Cut the widest ribbon the longest (Theater Ribbon Originals) and the narrowest ribbon the shortest (Chocolate Chip grosgrain). If you’re using a third width of ribbon, cut it to a length in between the others.3. Trim ends as desired.4. Layer the ribbon with the longest and widest ribbon on the bottom and the shortest and narrowest on top. Tie the stacked ribbons in the center with another piece of ribbon.5. Trim and conceal the ribbon tails or use them to secure the bow to the card or package.

Tying a Tailored Bow

1. Cut a piece of ribbon or paper twice the desired length of the finished bow. We used Old Olive Prints Designer Series paper.2. Form into a loop and secure ends together. Flatten the loop and secure in the center.3. Wrap another piece of ribbon around the center, and adhere the ends to the back of the finished bow. Now that you’ve learned how to tie a variety of bows, spend some time practicing. We all know that “practice makes perfect”, don’t we. After you’ve practiced, show me what you’ve made with some of the bows here. Post a comment here with a link to your project so we can all admire your work!

July 25, 2010

Jitterbuggin Challenge - Black and White Sketch w/one other!

Happy Sunday Friends! Here is my entrance for the Jitterbuggin challenge. My color (as you can see) was PINK! We were supposed to use black white and one other color. My choice was pink. Oooooh, I couldn't resist it! It's really hot out here, I'm not sure where everyone else is, but it sure is a hot one today. So what better why to cool oof then with cricut crafts?? Yeah, i don't know either!

I hope everyone still had a wonderful Sunday, even though it was SOOOO HOT out today. God Bless and I'll be back! :O)
Thanks for stopping by.
The Cupcake Cricut

July 24, 2010

Christmas in July


Here is my entry for Fantabulous Cricut. Christmas in July. I'll be back to share the recipe!

Have a great Saturday everyone :O)


July 22, 2010

For My Friend Veronica

Photobucket

This is for you my friend! Enjoy it! Here is the url: (let me know if it works, ok?)

Blessings!! :O)

http://i281.photobucket.com/albums/kk218/anointedwife/FullyRelyOnGodKnottymoose180.gif
post divider Pictures, Images and Photos

I Won!! Top 3! Jitterbuggin' Challenge Blog

Photobucket


I won Top 3 at the Jitterbuggin' Challenge blog! I actually did it! I'm so thankful God chose me to win this time! Congrats to the other 2 winners too! Yeah!!
post divider Pictures, Images and Photos

Construction Almost Complete

Welcome to my blog Pictures, Images and Photos
As you know I've been trying to update my blog. My favorite season is coming and I just wanted to get a leg up- so to speak. The other reason I changed my blog is because I wanted to add another element to it. CUPCAKES!! Yes, you heard right. I love cupcakes and I love decorating them. I haven't done it much in the past year, but I hope to get into it again! Hence the name The Cupcake Cricut.

I think I'll have to keep my link the same, but from here on out it's The Cupcake Cricut! If I have to change the link I will, but I'll let you know before any of that happens! :O)

p.s. Thanks for hanging in there with me!
These aren't mine, but this is what I want to do: (found online)
Cupcake Tower Pictures, Images and Photos

post divider Pictures, Images and Photos

July 20, 2010

Blog Under Construction Today

Just a little updating. I'm doing some rearranging and changing to my blog, but I'll still be posting. Just changing the look and feel. Also, I wanted to add some more stuff about my other hobby-CUPCAKES! So I may chage the blog name. We'll see.

post divider Pictures, Images and Photos

Fantabulous Cricut Challenge!

This weeks challenge at FC is Christmas in July! Funny huh? Veronica, where are you darlin? Do you wanna do this one too? See other's designs at www.fantabulouscricut.blogspot.com

Christmas in July:
Create a Christmas theme project, perhaps something to get ready for the upcoming holiday.

*As always, there does need to be a Cricut cut somewhere on your project, it does not have to be the item listed in the theme, though the theme does need to be incorporated as well.

post divider Pictures, Images and Photos

July 19, 2010

Shaker Card How-To

Supplies:
Cardstock
Stamps
3-D Foam Strips
Overhead Transparencies
Scissors
Fillers such as mini beads, punches, confetti, sand, glitter, etc.

Directions:
Plan your shaker box for your card or scrapbook layout. I start by choosing what I want to show in the window and then work from there. Stamp your focal point that will show through the window and set it aside.

Cut a “window” out of contrasting cardstock or paper to make a frame for your shaker box.

Cut your overhead transparency to be the same size as your frame.

This step is important - attach the transparency to the backside of the shaker box frame. The transparency is supposed to be between the cardstock and foam squares. This is where sometimes get mixed up and accidentally attach the transparency after the 3-D foam strips instead of before.

Use 3-d Foam Strips to line the outside edges of the shaker box right around the opening. Close to My Heart's 3-D foam is so nice because it comes with both strips and squares of different sizes to accommodate the size and shape of the shaker box.
Put your chosen filler inside the box. You can use any of our My Accents beads or sequins, confetti, micro beads, sand etc.

Peel off the adhesive cover from the foam strips.

Carefully attach the focal point to the back of the shaker box. Attach the shaker box to your card or scrapbook layout and you're done!

post divider Pictures, Images and Photos

Distressing Information

Distressing 101
I love the look of distressing. It’s amazing how much some ink and roughing up some cardstock can add interest and uniqueness to a project. It’s simple to do. And our distressing kit has all the tools you need! Here are some tips on how to use the Edge Distresser and Distressing inks to add emphasis to your next project.

How to Roughen Edges Safely with the Edge Distresser

1. Place edge of cardstock into one of the blade openings of the Edge Distresser.
2. Holding the Edge Distresser perpendicular to cardstock, drag blade lightly along edge to roughen up the cardstock and expose the white core. I like to drag the Distresser back and forth for extra roughness.
3. Repeat until desired roughness is achieved.

Add Emphasis with Distressing Ink

1. Load the Foam Tool by rubbing it into the Distressing Ink Pad.
2. Swipe the Foam Tool along the edges of the paper to achieve a shaded effect. I like to hold the cardstock or paper in my hand and then rub or brush the foam tool against the edge to feather in the ink. If you put the paper down on the table and then brush with the foam tool, you tend to have residual circle marks instead of smooth color.
3. Add as much ink as desired.

post divider Pictures, Images and Photos

Jitterbuggin' Challenge Sketch #9

Here is my very first entry for the Jitterbugin' Challenge. I've never done a challenge before so, I hope this one is the beginning of something great!

My sentament is from the Stamping cartridge. I used copics on the words with dots.


I hope you can see it better then I can. Stoopid dial-up.

post divider Pictures, Images and Photos

July 18, 2010

Have a Happy and Blessed Sunday

I've haven't been feeling 100% lately, but I managed to put together some cards! Hee Hee! :O)

I pray everyone is having a blessed Sunday. I've decided I'm entering 2 challenges. Jitterbug and the Fantabulous Cricut. I haven't printed off thier rules yet, but I will. I'm kinda excited. I also think I'm going to become a CTMH consultant! Yeah, crazy right? We'll see!

Veronica: Your blessing is on the way!! Amen! :O)
this is one I made for my daughter's birthday. She's growing up in front of my eyes!!


This one is just a "hello" type card. :O)


post divider Pictures, Images and Photos

July 14, 2010

Eyes To See Ears To Hear

It's been a while since I've posted some prayers, so I thought I'd do a devotional before I go to bed. This is by Keith Moore.

You have the mind of Christ.

That's what God's word declares in I Corinthians 2:16 about every born-again believer. But what does that mean and what does it enable the beliver to do? It enables us all to see, hear and discern like Christ.

First Corinthians 2:9-10 declares: "Eye hath not sen, or ear heard, neither have entered into the heart of man, the things which God has prepared for them that love him. But God has revealed them unto us by His Spirit."

I just thought this was a wonderful note to end my day with.

Be blessed my friends..:O)
post divider Pictures, Images and Photos

July 12, 2010

...Fun Challenge..

I found this over at my friend Veronica's blog. She's a super artist and has a blog named Lovin my Stuff! http://lovnmystuff.blogspot.com. The Challenge is over at Jitterbuggin' blogspot.com. Here are the rules. I think I'm gonna try and enter. Just for the practice of it all.??

**********
Follow the sketch: substitute at will, but it must look like the sketch

Use a Cricut cut of something from the beach. Animals, flip flops, shells, whatever.......

Use red and yellow somewhere on your card.

That's it......entries are due July 14, 2010, at 11:59 p.m. EST. Top 3 will be entered into the drawing for the Sentimentals cartridge this month.

post divider Pictures, Images and Photos

July 9, 2010

Mini-Album Stuff

I wanted to save this link for future reference: All About Mini Books on the cricut board.

http://www.cricut.com/messageboard/tm.aspx?m=6140062&mpage=12

post divider Pictures, Images and Photos

Some Challenges and Websites to check out!

Sunday Challenges
52 Sketches 52 Weeks
Bitten By the Bug
Card Positioning Systems
Creative Therapy
Pencil Lines
The Design Experiment

Monday Challenges
2 Sketches 4 You
Color Combos Galore
How Much is Too Much?
Mojo Monday
Mothers and Daughters Creations
Papertake Weekly
Sketch and Stash
Sketches! {by Tamara}

Tuesday Challenges
Arty Girlz
Scrapiopath
Sketches! {by Tamara}
Stuck?!

Wednesday Challenges
Kristina Werner's Color Inspiration
Mix it Up!
One Little Word
Split Coast Stampers Resources

Thursday Challenges
Cute Card Thursday
Sketches! {by Tamara}

Friday Challenges
Daring Cardmakers
Kristina Werner's Finally Friday
Triple the Sketch

Saturday Challenges
BasicGrey Challenges
My Sketch World
Secret Crafter Saturday Challenge
Sketch Saturday
Triple the Sketch


Here are some other Great Sites
Caardvarks
Christmas Cards All Year 'Round
Gettin' Sketchy
Going Buggy: http://going-buggy.blogspot.com/
Heart Prints
JuJu Bee's Scrapbook Corner: http://http//jujubeesscrapbookcorner.blogspot.com/
Scrapbook & Cards Today
Scrapdragon: http://thescrapdragons.blogspot.com/
Scrapjacked!: http://scrapjacked.blogspot.com/
Scrapping Mommy
Scraps-n-Such
Sheetload of Cards: http://sheetload.blogspot.com/
Whimsical Scraps and Bugs: http://whimsicalscrapsandbugs.blogspot.com/


post divider Pictures, Images and Photos

Awesome .cut file resource

My daughter is returning to school in the fall. Well actually August 25th or so and she is pledging Delta Sigma Theata I believe, but I found this website that has a word book and I hope I can do something for her before she leaves for school the website is:
http://www.magandamemories.com/ If you need some cut files I would check her blog out and say hello!
post divider Pictures, Images and Photos

July 8, 2010

Beautiful cards...

I guess I was kinda busy the last few days. Here area few more projects that I'm sending to my mom when I can. I have a huge package for her birthday. Sorry this first one is sideways, but you get the point! Enjoy: Carts used: Hello Kitty, Animal Kingdom for hte bookmark and Cherry Limeade for the baby card.


post divider Pictures, Images and Photos

Puppy Love

Here is a Puppy Love card I did. My first one with my new Paper Pups. I have 2 dogs and I thought this cart was just too cute. I can't wait to do some other cuts with it. Do you believe that there are some carts I haven't done a single cut on yet? Sad isn't it?
post divider Pictures, Images and Photos

July 7, 2010

Storage Ideas

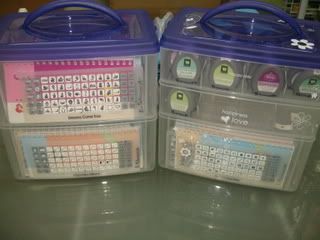
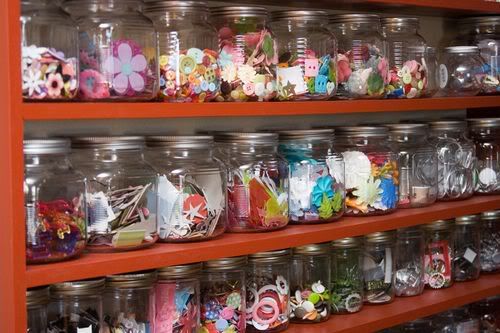
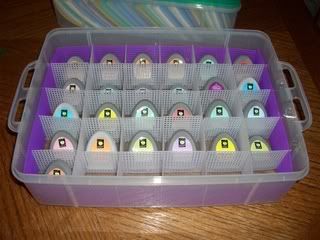
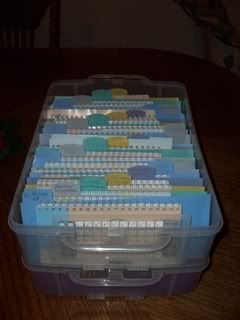
I found pictures of these online: I was trying to organzie my stuff (once again) and so I thought I'd post some more pics: (I have a system like this, but need something bigger since my stash is getting bigger.)

cricut
cricut
cricut
I'd love for it to look like this:
scrapbooking
post divider Pictures, Images and Photos